Getting started with Docker and the wonders of Open Source
05 Apr 2015As Docker has been a buzzword lately(last year or so) I though that I should give it a try and really do something with it besides reading articles about how great it is.
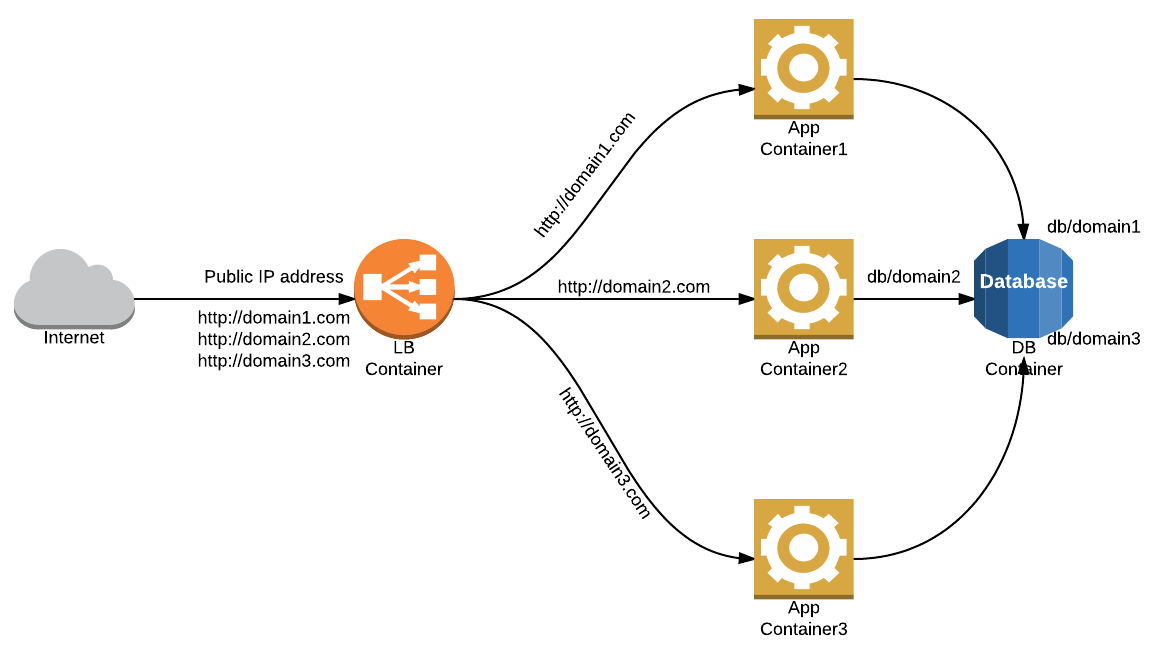
First thing that came to mind and most handy I guess is to build a LAMP stack environment for Wordpress sites. So how do I start? Well, let’s take the LAMP environment and split it into components: we need a database to store data and a web server that can process the Wordpress PHP code. Based on this I decided to create a container for the MySQL database and a container for running Apache plus additional PHP modules. Then I would also like to run multiple Wordpress instances on the same server to make use of all the resources. In order to achieve isolation between the apps we can create separate containers for each WP instance, each with its own database on the MySQL server. Nevertheless since we want all the instances accessible by a single IP address, we also need a load balancer that routes traffic to the webserver containers according to the Host field in the HTTP header.
Below is a diagram that better describes the flow:
 So, let’s get started. I got a Fedora21 instance powered up and followed the documentation here[1] to get Docker up and running. Once I got the docker environment ready I started searching for some examples that would quickly get me started with the apps that I needed. So I started with the MySQL server. A quick search on Google pointed me to the official MySQL repo[2] on Docker Hub that contains pretty straight forward documentation on how to get a running MySQL container.
Here’s the command that I ran in order to get it running:
docker run --name db-server -v /srv/db-server/storage:/var/lib/mysql -e MYSQL_ROOT_PASSWORD=$(openssl rand -hex 10) -d mysql:latestWhat this does is that it creates a container called db-server with the /var/lib/mysql directory mounted from the /srv/db-server/storage directory on the host file system, injecting the MYSQL_ROOT_PASSWORD(some random generated hex string) environment variable that will be used at database server initialization and it uses the image called mysql(pulled from Docker hub) with the tag latest to build from. I chose storing the mysql content to a directory accessible on the host because I am not familiar yet with the Docker images and file system and I would like to preserve the db data in case I mess up something with the containers. Now that we ran the command we should see the container running:
docker ps
CONTAINER ID IMAGE 		COMMAND 		CREATED 	  STATUS  PORTS NAMES
c383c56a7e66 mysql:latest	"/entrypoint.sh mysq   About an hour ago   Up 7 seconds        3306/tcp            db-server
We can see that the server is running and it’s exposing the MySQL port 3306. You can check the container properties by running ‘docker inspect db-server’. This should return a json containing all the container properties including the environment variables that were set at start, including the MySQL root password. We can actually check the current databases by running this dirty one liner:
docker exec db-server mysql -uroot -p`docker inspect --format '' db-server | awk {'print $1'} | awk -F '=' {'print $2'}` -e 'show databases'
Database
information_schema
domain
mysql
performance_schema
So now that we have the DB server ready we can proceed further with creating the Apache webserver. First thing before reinventing the wheel is to search if others already created the wheel. As expected I found John Finks docker-wordpress repo here[3] where he covers a full LAMP stack, including Wordpress container. I didn’t need all that for my webserver containers but it was a great starting point for me. So I forked it, did some changes and it resulted in the following repo. Let’s take a look at what’s inside the repo. We have a Dockerfile and 2 directories: configs and scripts. The 2 directories actually contain files that are called in the Dockerfile. What is this Dockerfile? It’s the file used for building Docker images. Usually it contains a base image and some additional steps that are ran on top of the base image. For instance my Dockerfile uses the Debian image tagged latest as base, then it adds the Dotdeb repos, installs the packages required for Apache and PHP modules, adds the config files from the config directory inside the image and also the files from the scripts directory that are going to be run when the container starts. Let’s build the image by using this Dockerfile.
git clone https://github.com/remoteur/docker-wordpress.git
cd docker-wordpress/
docker build -t webnode .
It takes some time to build the image and after it’s finished we can go ahead and fire up the webnode container.
docker run --name webnode -v /srv/webnode/www:/var/www/ --link db-server:mysql -d webnode:latestWhat this does is that it runs a container called webnode which is linked to the db-server container so that it can access it by it’s name (mysql in our example) and it’s using the image that we’ve just built called webnode with the ‘latest’ tag. Again we want the data that’s important to us from the container to be stored directly on the host file system so we mount the /var/www directory from the host’s /srv/webnode/www directory. We can now see both the containers are running:
docker ps
CONTAINER ID IMAGE COMMAND CREATED STATUS PORTS NAMES
4aba6d289230 webnode:latest "/bin/bash /start.sh 3 minutes ago Up 3 minutes 80/tcp webnode
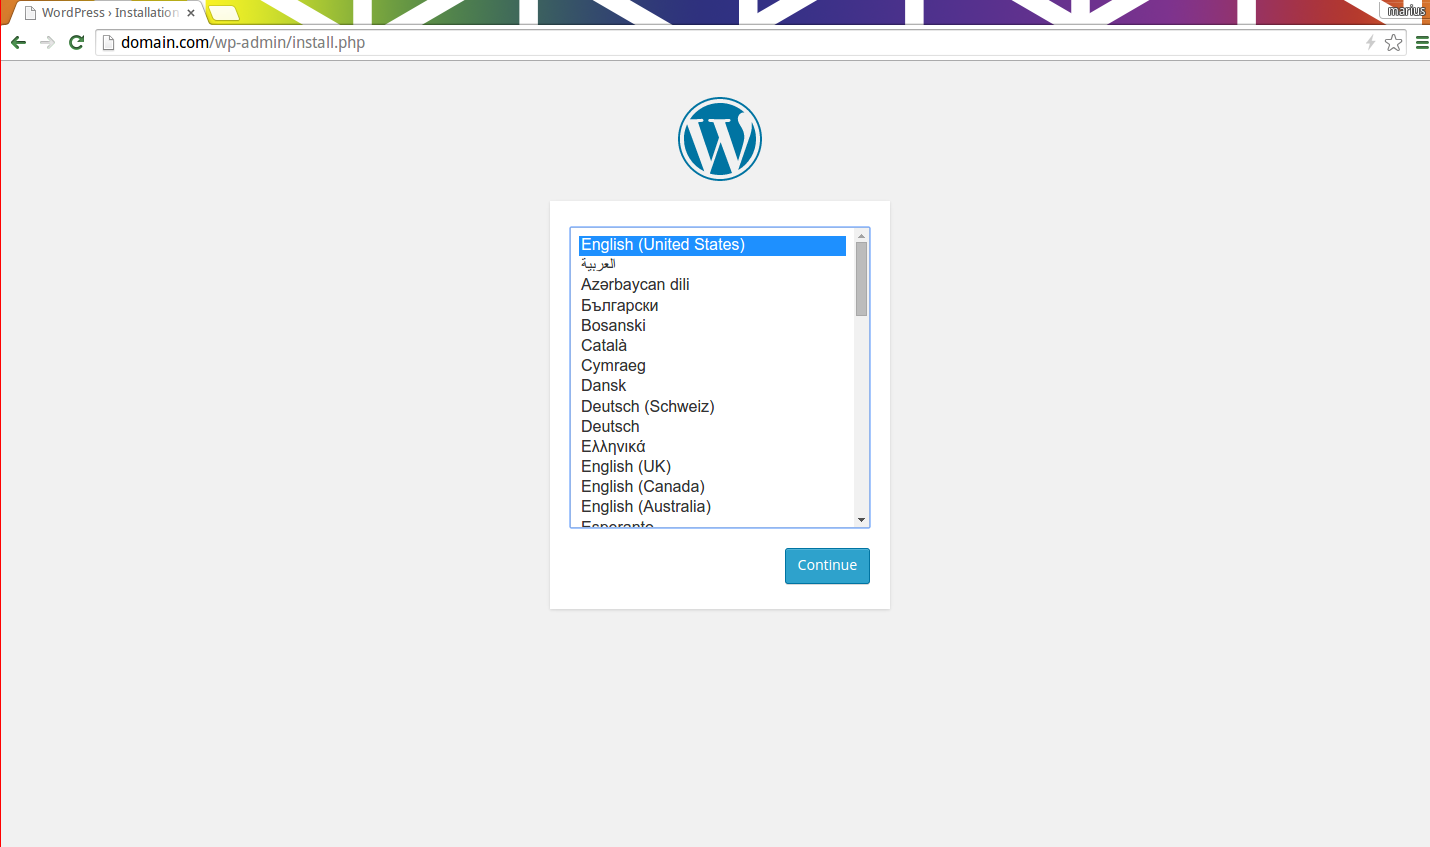
c383c56a7e66 mysql:latest "/entrypoint.sh mysq 2 hours ago Up 32 minutes 3306/tcp db-serverAt this point we have the database server and webserver running but without any content in the Apache root directory. So in order to get Wordpress automatically installed when running a webnode container I wrote a quick bash script that creates the requirements for the Wordpress instance such as database, database user, pulls the latest Wordpress and adjusts the wp-config.php file so it matches the db settings. You may find the script here[5] After running the container by using this script we have a full runing LAMP environment with Wordpress code installed in the Apache root. The only thing that we’re missing is the load balancer container that will acutally expose the websites publicly by the hosts IP address and route traffic to the webnode containers. Basically this could be done by installing an Nginx container that acts as a reverse proxy. But then we’d need to adjust the Nginx configuration files manually which we don’t want because we hate doing manual operations, right? :) So next step is to search for how others do this, I’m pretty sure I’m not the first one that hit this issue. My searches brought me to Jason Wilder nginx-proxy github repo[6] which does exactly what I need. Basically the repo contains a Dockerfile that installs nginx plus docker-gen. Docker-gen is a tool that generates files based on templates and docker containers metadata. What this does in our case is that it watches for containers that are ran with the VIRTUAL_HOST env var set, generates the nginx config file containing the server directive with the values passed through VIRTUAL_HOST and reloads the nginx service in the end.
That’s pretty awesome so let’s start it:
docker run --name loadbalancer -d -p 80:80 -v /var/run/docker.sock:/tmp/docker.sock jwilder/nginx-proxyThe command runs a container called loadbalancer with it’s port 80 translated to the host’s port 80(listening on all interfaces), the Docker socket file on the host(/var/run/docker.sock) is accessible inside the container by /tmp/docker.sock and it’s using the jwilder/nginx-proxy image to run from. We should now be able to create a new webnode container and access it via the the hosts IP address on port 80. Let’s give it a try and see if it works:
bash create_wordpress
Enter wordress domain:
domain.com
Creating container web root in /srv/webnode/webnode-domain.com/www
Downloading Wordpress to webnode-domain.com
Creating Wordpress database
Adjusting wp-config.php
Adjusting permissions for www-data
c9f7ebb1935f60c293d6feddfb436321afb9b5d1b57800da62d77d49a292dbdb
root@docker:~>> docker ps
CONTAINER ID        IMAGE                        COMMAND                CREATED             STATUS              PORTS                         NAMES
c9f7ebb1935f        webnode:latest               "/bin/bash /start.sh   34 seconds ago      Up 31 seconds       80/tcp                        webnode-domain.com
812324707acd        jwilder/nginx-proxy:latest   "forego start -r"      8 minutes ago       Up 8 minutes        443/tcp, 0.0.0.0:80->80/tcp   loadbalancer
4aba6d289230        webnode:latest               "/bin/bash /start.sh   39 minutes ago      Up 39 minutes       80/tcp                        webnode
c383c56a7e66        mysql:latest                 "/entrypoint.sh mysq   2 hours ago         Up About an hour    3306/tcp                      db-server
And the result:
That’s pretty awesome given the fact that I was able to do this in a couple of hours on a lazy Sunday. I’m pretty sure Docker has its caveats (building images takes such a long time) but it’s amazing how fast you can achieve this kind of automation and get familiar with the technology. Long live the Open Source community! :)
[1] https://docs.docker.com/installation/fedora/
[2] https://registry.hub.docker.com/_/mysql/
[3] https://github.com/jbfink/docker-wordpress.git
[4] https://github.com/remoteur/docker-wordpress.git
[5] https://gist.github.com/remoteur/6b12ce450d0005acc287
[6] https://github.com/jwilder/nginx-proxy.git